
此部份是 【技術躍升系列】SB02 - Docker Build 的答案,如有興趣可以了解題目再看答案!
答案總共有 4 個可改善的地方:
- Integrity
- Docker build Context
- Docker Layer Caching
- Advance Multi-Stage Build
Integrity
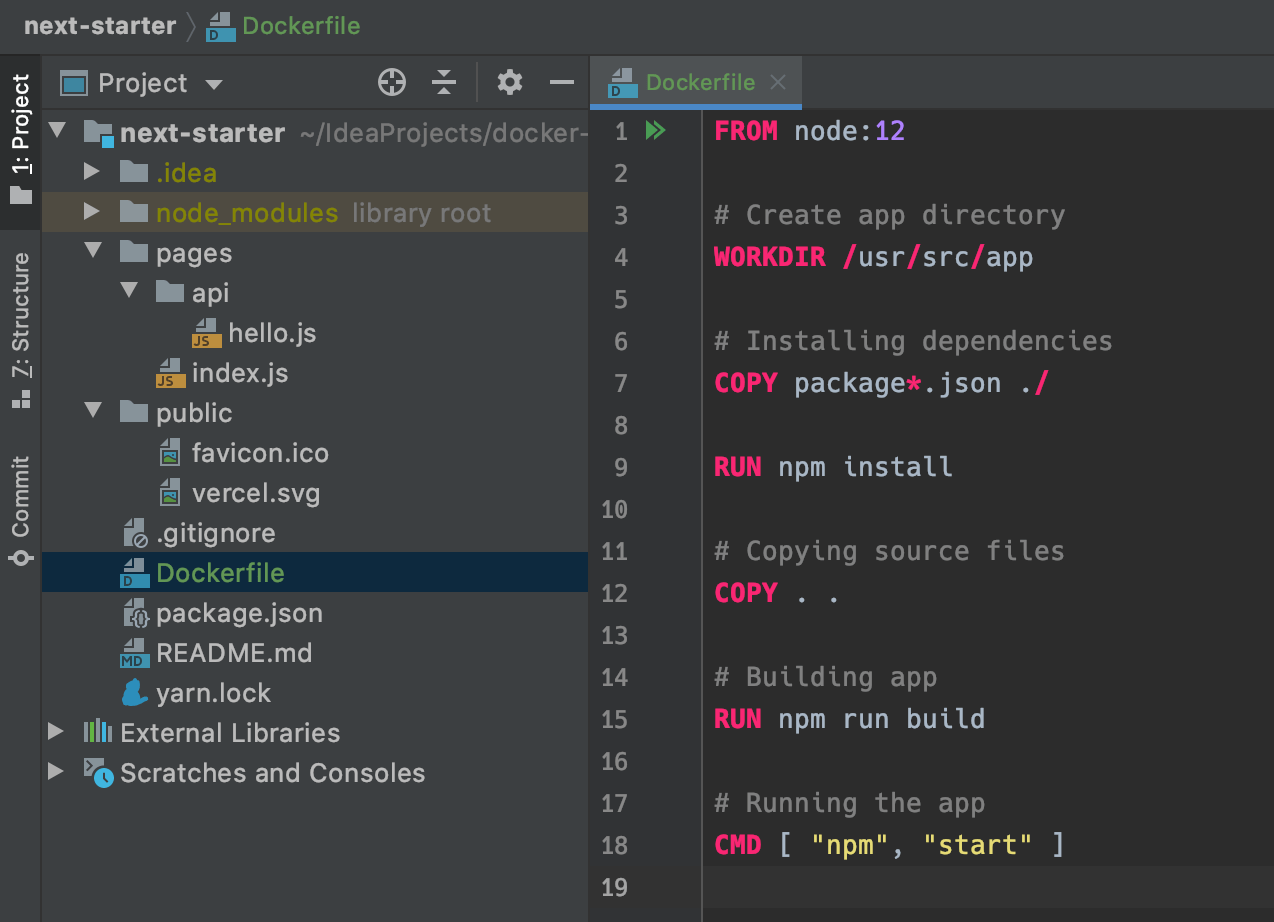
注意 Package Manager
NextJs Starter Template 中使用 yarn 作為 Package Manager,Local Development 時生產出 yarn.lock ,但 Dockerfile 卻使用了 npm 不是使用 yarn 會無法使用 yarn.lock 所指定的 Dependencies Version
yarn.lock 的官方簡介
In order to get consistent installs across machines, Yarn needs more information than the dependencies you configure in your package.json. Yarn needs to store exactly which versions of each dependency were installed.
改動 1:將
npm改成yarn
注意 Docker Base Image
在 DockerHub 的官方 Node Repository 當中,有大量 Version 可以選用。
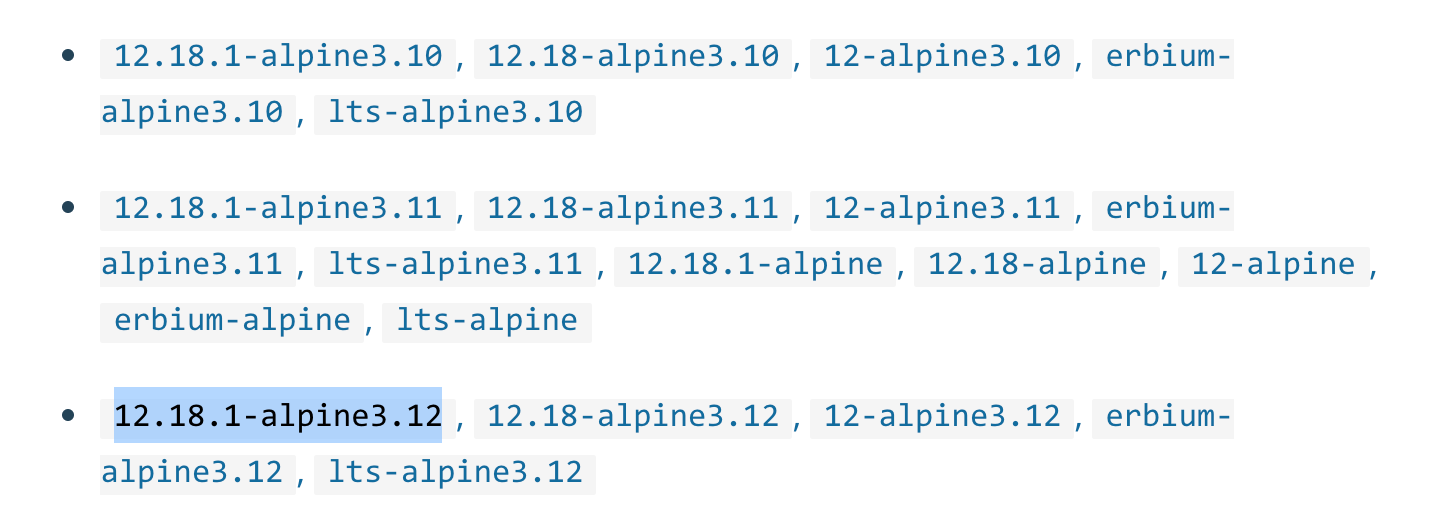
使用特定的 Version 一定利多於弊,當你碰到一此 Environment 問題時可以更快知道對應的 NodeJs 版本及 Linux Distro 的 Version。
你可以視乎自己的需要選擇合適的 Base Image,一般沒有特別 Implemenation Tightly Couple Linux Implementation 基本上都可以使用 alphine 的 Image(Size 最少的 Image)
改動 2:將
node:12改成node:12.18.1/node:12.18.1-slim/ node:12.18.1-alpine3.12`
Docker Build Context
注意 Docker Build Context
以下的 Docker Build Command 為例:
docker build . -t next-app
一般使用 Proejct Directory 進行 Docker Build 時,如果沒有使用 .dockerignore 去控制傳輸入 Docker Context 的 Files,Docker 基本上會將整個 Directory 內的所有檔案 Copy 到 Docker Context,包括如黑洞般多 File 的 node_modules 。
除了 node_modules 外,而最多人忘記加 .git 令 Docker 會將整個 .git Folder 抄入 Build Context。
若你抱有懷疑,你可以在一個已有的 Docker Build 的 Project 下加入一個巨型 File,測試一下:
# if your project is not a git directory
mkdir .git
# create a 100MB dummy file
mkfile 100M ./.git/dummyfile

docker build . -t next-app
你將會出現同樣的畫面:

密切留意 .dockerignore 減低 Layer Cache Invalidate 的機會
如果你的 Dockerfile 必需使用以下 Command:
COPY . .
那你就要密切留意你的 .dockerignore 內有沒有 ignore 一樣經常會有 Changes 的 folder,否則你的 Docker Layer Cache 將會不停地 Invalidate
# Commmon
**/.git
**/.gitignore
**/README.md
**/.idea
**/.vscode
**/*.log

# NodeJs Specific
**/node_modules

# Project Specific
.next
改動 3:加入
.dockerignore並加入對應的 ignore pattern
Docker Layer Caching
Docker 會在偵測 Context 內的改動,如果發現改動,那對應的 Command 的那一層 Docker Layer 及其後的 Layer 都會 Invalidate。
Docker Layer Cache Invalidation 的官方簡介:
Once the cache is invalidated, all subsequent Dockerfile commands generate new images and the cache is not used.
如果你的 Project 有大量的 Image / Vidoes Assets (100MB?) 而且使用 Copy . . 的話,更改一句 Source Code 就會重新建立一個 Docker Layer Cache 即 I/O 會產生出來。
改動 4:
COPY . .拆分為COPY {Assets}及COPY {Source Code}
注意 Dockerfile Command 的次序
以下是一個錯誤示範,將 Dockerfile 的兩句次序亙換:
# Incorrect Demo!!!
# (A) Copying source files
COPY pages ./pages

# (B) Copying Assets files
COPY public ./public
當有任何 pages/* Source Code 改動時,由於 A Command 所建立的 Docker Layer Cache 會被 Invalidate,那麼 B Command 的 Docker Layer Cache 也因此會被 Invalidate。
Command 亙換後就不會有上述問題:
# (B) Copying Assets files
COPY public ./public

# (A) Copying source files
COPY pages ./pages
B Command 的 Docker Layer Cache 將會一直重覆地使用,直至 public Folder 內有改動。
Advance Multi-stage Build
在小明這個 NextJs Starter Template 的例子中,用 Multi-Stage Build 是沒有太大幫助的。在 NodeJs Project 中,一個常見使用 Multi-stage Build 方法,就是為了減低 Docker Image 的 Image Size。
因為 Nodejs Project 要 Build Production Assets 時,少不免會使用部分 devDependencies ,例如 Babel、Typescript,還有一些提高 Productivity 的 Dependencies 如 StoryBook、Eslint、Prettier ⋯⋯ 也有一些 Run Test 用的 Dependencies 如 Jasmine、Jest、Karma⋯⋯。
如要 Docker Image 只有 Production Dependencies,你需要用 Multi-Stage Build 達成上述目的,透過再運行以下 Command 讓 Yarn 幫你移除所有 devDependencies
yarn install --production --frozen-lockfile --offline
在 SB02-docker-build/repo/package.json 嘗試加入以下 devDependencies :
"devDependencies": {
    "@babel/core": "^7.9.6",
    "@storybook/addon-actions": "^5.3.18",
    "@storybook/addon-docs": "^5.3.19",
    "@storybook/addon-info": "^5.3.18",
    "@storybook/addon-links": "^5.3.18",
    "@storybook/addon-storysource": "^5.3.18",
    "@storybook/addon-viewport": "^5.3.18",
    "@storybook/addons": "^5.3.18",
    "@storybook/preset-typescript": "^3.0.0",
    "@storybook/react": "^5.3.19",
    "@types/classnames": "^2.2.10",
    "@types/mdx-js__react": "^1.5.2",
    "@types/node": "^14.0.14",
    "@types/react": "^16.9.41",
    "@types/react-dom": "^16.9.8",
    "@types/react-icons": "^3.0.0",
    "@typescript-eslint/eslint-plugin": "^3.4.0",
    "@typescript-eslint/parser": "^3.4.0",
    "babel-loader": "^8.1.0",
    "babel-preset-react-app": "^9.1.2",
    "eslint": "^7.3.1",
    "eslint-config-prettier": "^6.11.0",
    "eslint-plugin-prettier": "^3.1.4",
    "eslint-plugin-react": "^7.20.0",
    "husky": "^4.2.5",
    "jest": "^26.1.0",
    "npm-run-all": "^4.1.5",
    "prettier": "^2.0.5",
    "tailwindcss": "^1.4.6"
  }
以上㫮是很常見的開發 Dependencies,在沒有個 Optimization 下,加入 devDependencies 後 Docker Image 由原來的 238MB 飄升到 671MB。
做了 Multi Stage Build Optmization 後,Docker Image 可縮減至 211MB

完整的答案
# .dockerignore
# Commmon
**/.git
**/.gitignore
**/README.md
**/.idea
**/.vscode
**/*.log

# NodeJs Specific
**/node_modules

# Project Specific
.next
# Dockerfile
# Use a more specific version for your production containers can help resolve issues
FROM node:12.18.1-alpine3.12 as FirstStage

# Create app directory
WORKDIR /usr/src/app

# Installing dependencies
COPY package.json yarn.lock ./

# Should use same package management as same as your development workflow
# The dependencies lock file is critical for reproduce to same behaviour
RUN yarn install --frozen-lockfile

# Copying Assets files
COPY public ./public

# Copying source files
COPY pages ./pages

# 1. Building app
# 2. Remove Dev Dependencies
RUN yarn build \
    && yarn install --production --offline

# Final Stage
FROM node:12.18.1-alpine3.12

WORKDIR /usr/src/app

# Copy all files from builder
COPY --from=FirstStage /usr/src/app /usr/src/app

# This don't actually publish the port but to give better documentation to your DevOps colleagues
EXPOSE 3000

# Running the app
CMD [ "yarn", "start" ]
GitHub:https://github.com/gaplotech/skill-boost-plan/pull/4/files
AWS Summit Online Hong Kong 2020 (July 7)
- 2:05pm - 2:35pm: ViuTV 廣東話分享 – Serverless Transformation on AWS
- 2:40pm - 3:10pm: Event-driven Architecture
還有 40 個不同範籌的技術分享,有啱就去報名喇!https://go.aws/3hSdriE